Teaming
We have news for you: KUM-Teams becomes Teaming! On December 6, the application will be converted, including the new domain from https://www.kum-teams.de to https://teaming.med.uni-muenchen.de.
But that wasn't enough for us: we took the opportunity to modernize the layout. Our redesign brings a breath of fresh air to the application - in line with the corporate design.
What's new?
Visual improvements:
- New folder icons for a better overview
- Updated font and font size (Roboto)
- Revised header area with logo and navigation
- Redesigned home pages: both the general home page and the home pages of the individual teams
New functions:
- "My teams" listing: directly on the team home page
- Revised team overview: The list of all teams is no longer in the left-hand navigation, but now appears with additional information (team leader, short description) directly on the start page. You will be able to filter this overview in future.
- Invite external members: Team leaders will soon be able to independently invite external members to their team.
- New folder types: Naming takes place during creation.
With the help of Teaming (based on Microfocus Vibe) you will achieve higher team and employee productivity and better project collaboration in INTERnet projects.
Teaming at LMU Klinikum München enables you to bring together globally dispersed employees, information and resources. Projects are optimally supported, as project-related information such as documents, ideas, plans, research results, milestones and tasks can be saved, organized and released for shared use in Teaming, depending on the desired authorization.
Teaming is suitable for all working groups that want to work together on content with access protection.
Teaming paves the way for intelligent, creative and productive collaboration between projects, project participants and team members.
Both employees of the LMU Klinikum and external cooperation partners can become members of a team.
Extremely powerful indexing leads to an optimal search option across all these sources. The search result depends on the authorizations and approvals you have assigned.
In addition, each team member has their own personal workspace with modules.
Login Teaming
Attention!
Our support is limited exclusively to the creation of a client and the configuration of access authorizations. In the course of our support, we can only respond to questions from you that we have developed through our own use of the product. Please refer to the original manuals and tutorials of the manufacturer Novell Vibe onPrem (see further links) for more detailed information on the individual functionalities and possibilities of the product, its operation and implementation of the associated possibilities.

Modules in Teaming
The following modules are available for the working groups in their respective "team workspace":
files
Each file name may only be assigned once.
This is a prerequisite for the joint editing of different file versions.
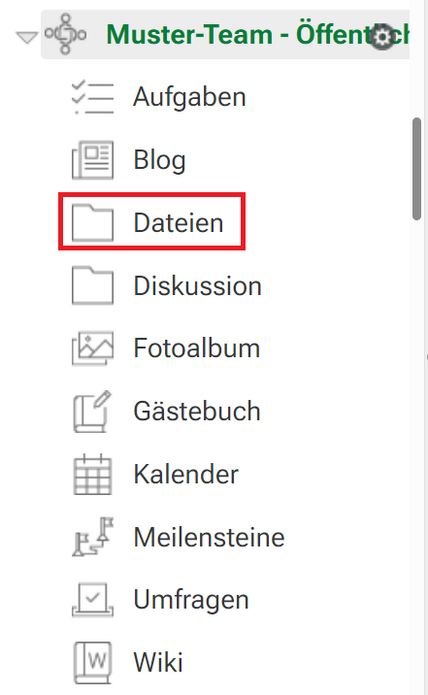
Each team can use the Files area to, for example
- Upload files,
- download files,
- edit shared files in Teaming.
WebDAV is supported by default for file import and version control.
The team leader decides whether the Files module is available in a team. To edit the Files area, open it via the left-hand navigation.
This variant is suitable for all users who
- do not have a current Java version.
- want to create additional information for the file when creating it.
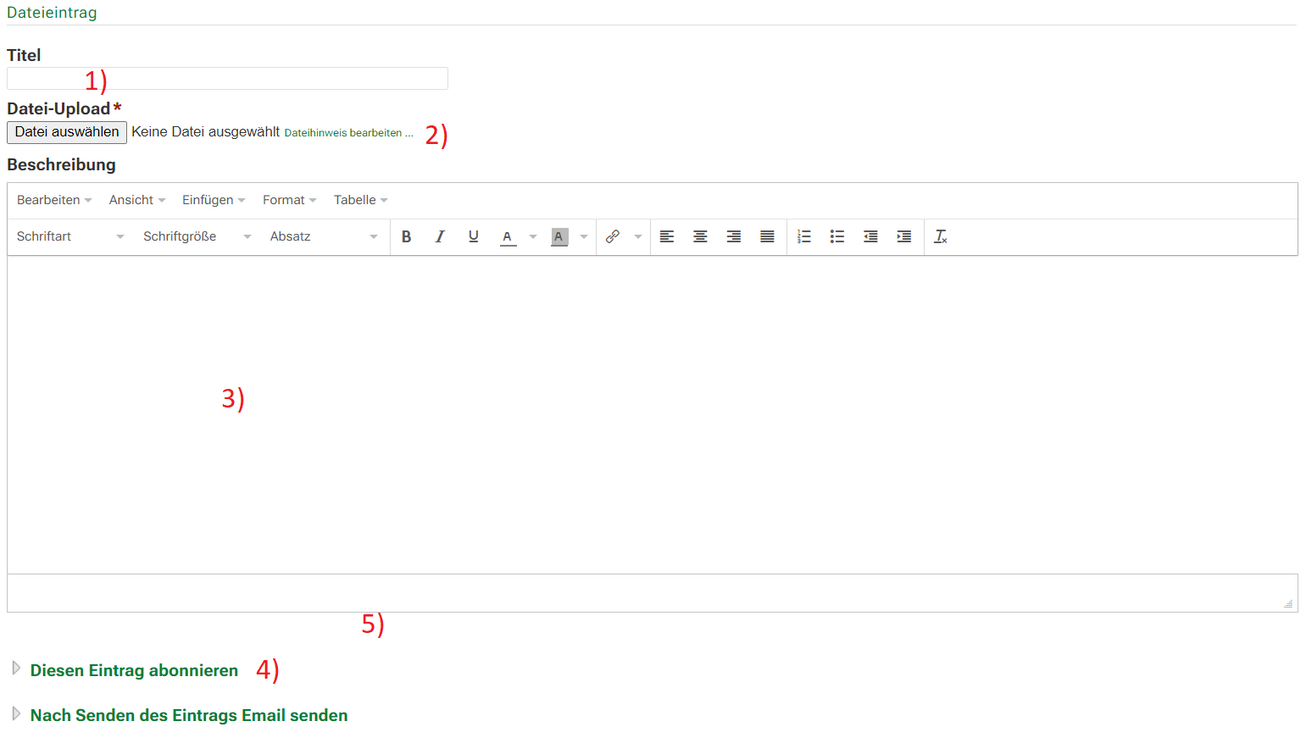
- Give your entry a meaningful title
- Select your file via "Browse".
- You can enter additional information about your file in the editor.
- Subscribe to this entry
- Here you can send an e-mail to individual users or your entire team, for example.

Use the "Add files" button to upload your file quickly and easily via drag & drop.
It is important that you drag your file into the area with the folder symbol. A Java applet will start and your file will be imported automatically. You can add comments to the file entry afterwards, for example.
Discussion
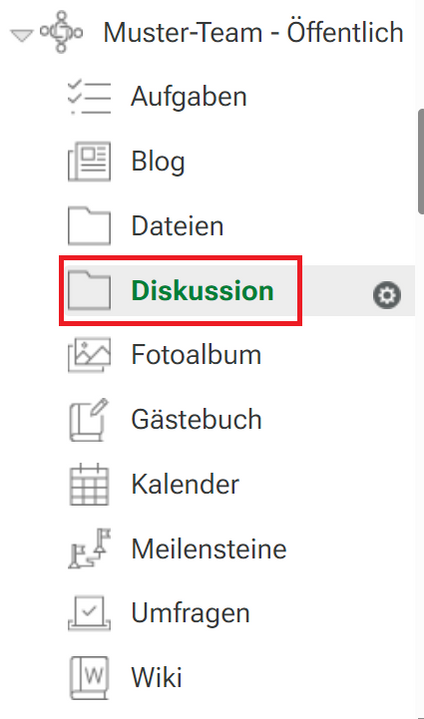
Each team can use the Discussion area to e.g.
- Discuss topics,
- work on problems.
The team leader decides whether there is a discussion area in a team. To edit the "Discussion" area, open it via the navigation on the left.
Click on the "New discussion entry" button to start a new topic. Each team member can open new discussion entries.
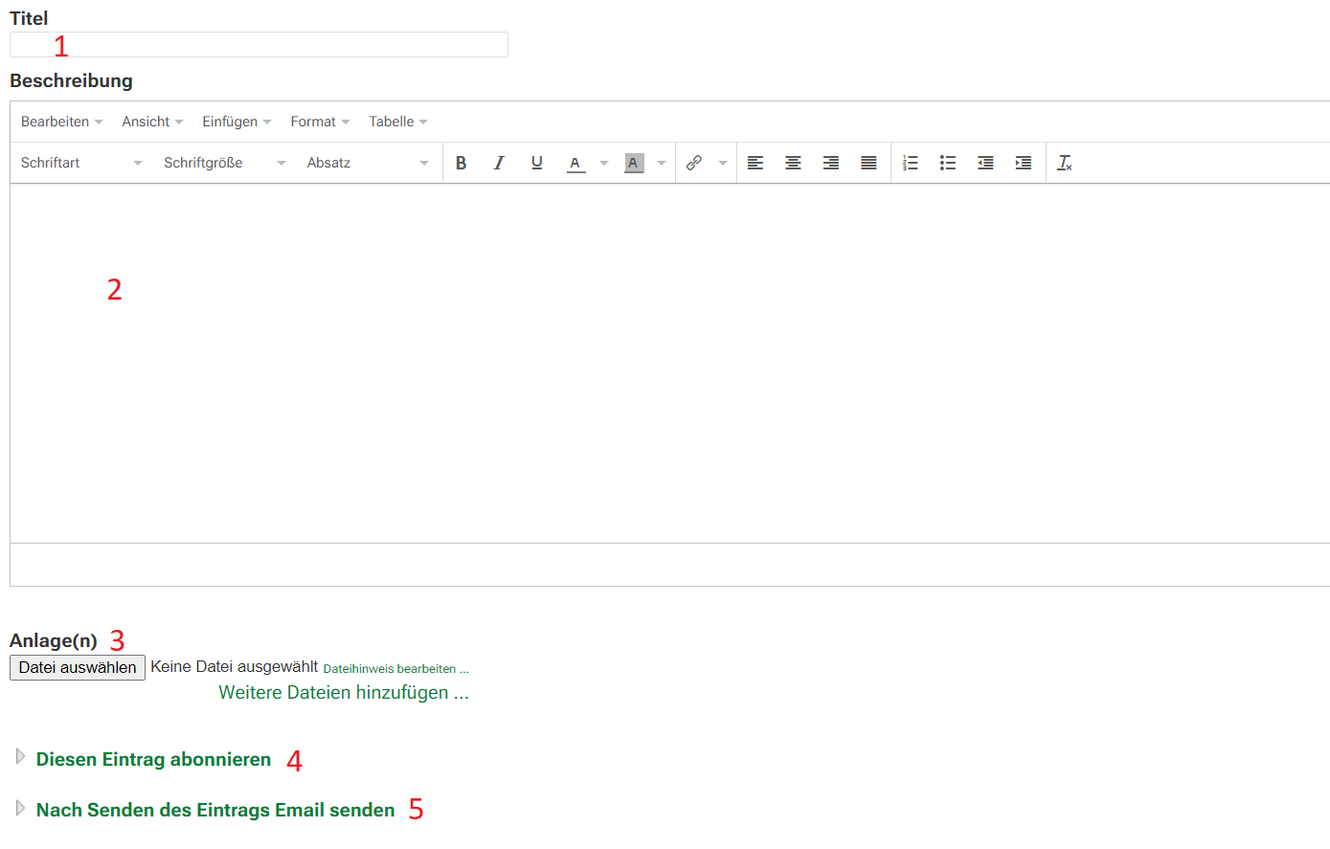
- Enter a title.
- Introduce the topic of the discussion.
- You can upload files as attachments.
- If you subscribe to the entry, you will be informed of changes by email, see entry in the user manual
- You can inform other people, groups or teams about the discussion entry using the "Send email after sending the entry" option.
Click on "OK" to publish your discussion entry in your team.
As soon as you have published the discussion entry, all team members can:
- reply
- rate
- Upload attachments
This example shows an ongoing discussion.
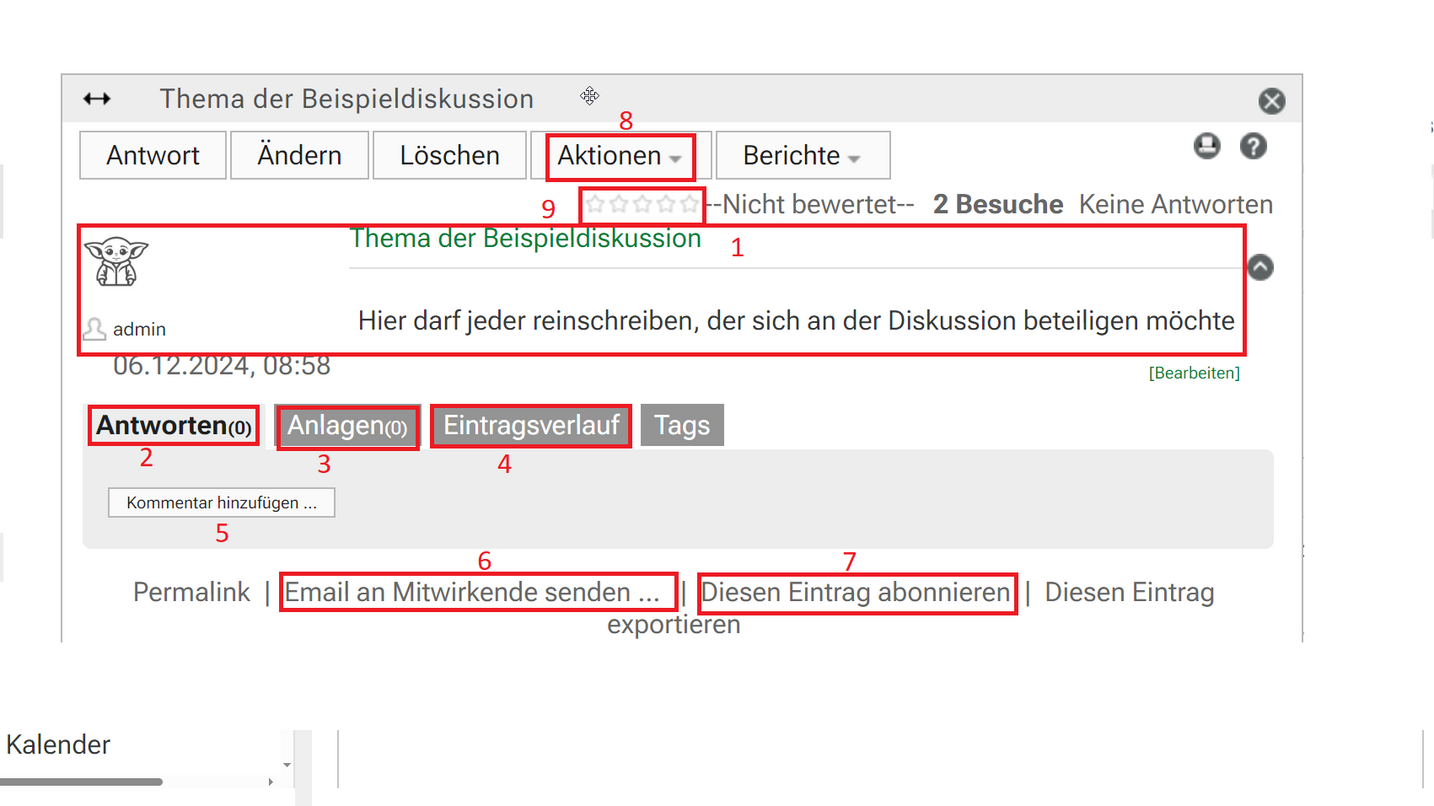
- The originally created discussion entry is always above the actual discussion.
- All comments are displayed chronologically.
- The attachments to the discussion entry are listed in a separate tab.
- The progress of the discussion is shown in the entry history.
- Each reply to the discussion can contain comments.
- You can use e-mail distribution lists to send an e-mail to specific recipients.
- If you subscribe to the entry, you will be informed of changes by e-mail.
- As the initiator of the discussion, you can delete or block the discussion, for example.
- Each team member can rate the discussion with up to 5 stars.
blog

Each team can use the blog area to, for example
- report on project progress,
- present information on an ongoing basis,
- document a work process.
The team leader decides whether there is a blog in a team. To edit the blog area, open it via the navigation on the left.
Use the "New blog entry" button to create a blog entry. Every team member can create blog entries.

- Give the blog entry a meaningful title.
- Write the blog entry in the text field. Design the content attractively with images, links and subheadings.
- You can add attachments to your blog.
- If you subscribe to the entry, you will be informed of any changes by e-mail.
- You can inform other people, groups or teams about the blog entry using the "Send e-mail after sending the entry" option.
Click on "OK" to publish your blog entry.
You can inform individual users, (directory service) groups or entire teams about the new blog entry via "Send e-mail after sending the entry". Click on this field to open further options:
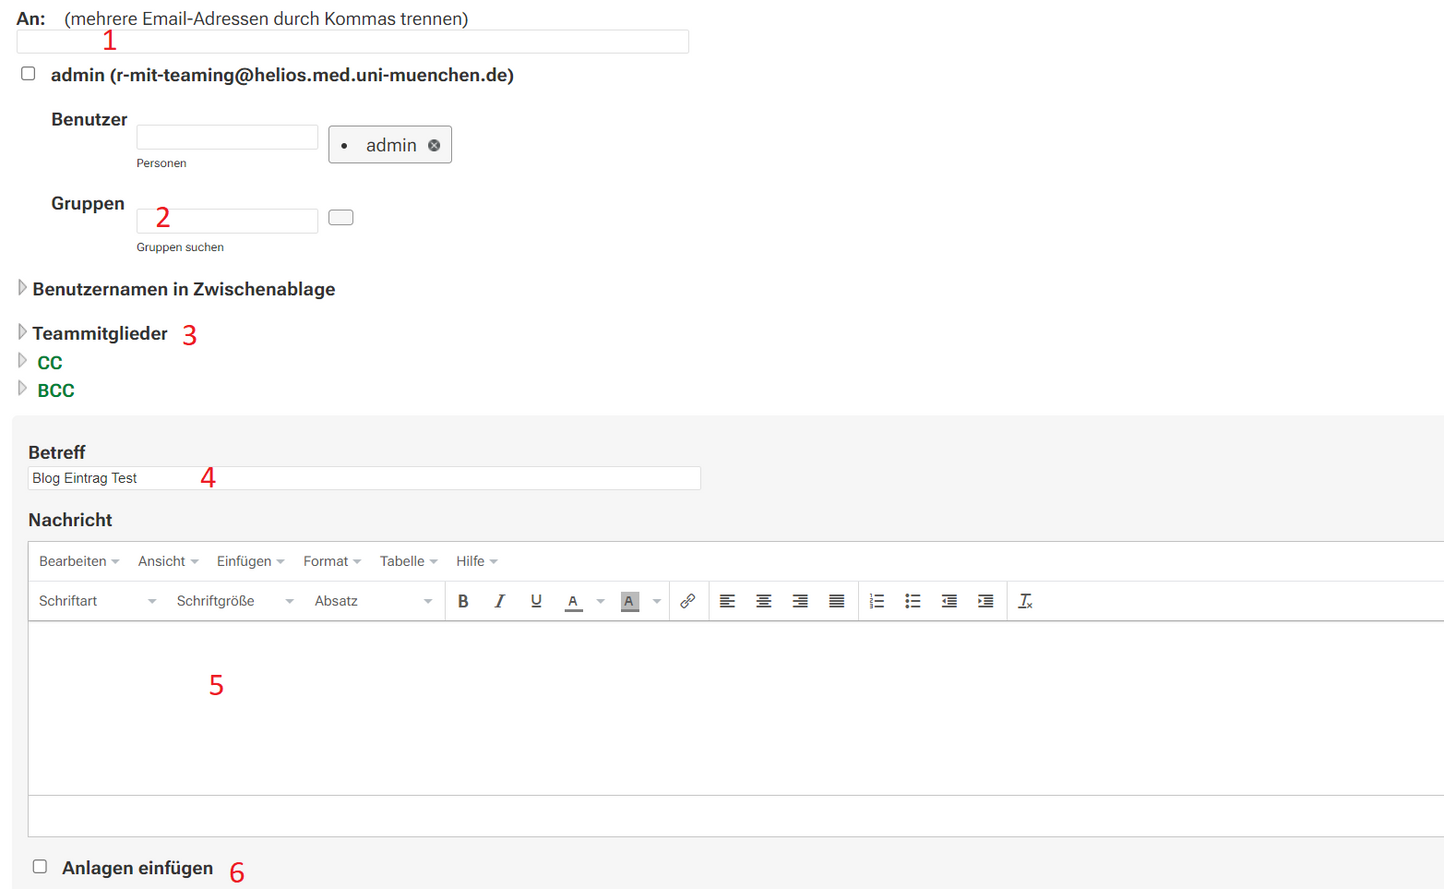
- Inform individual users (via their HELIOS ID or, in the case of external cooperation partners, their Teaming user ID).
- Inform groups (currently not possible).
- Inform the team members in whose area the blog is located.
- Define a subject.
- Create an additional description.
- You can insert attachments.
Click on "OK" to notify the selected recipients by e-mail.
Task management
Each team can use the Tasks area to, for example
- manage the pending tasks in the team.
Tasks can be
- be assigned to specific team members or groups
- be assigned to time periods
- be prioritized differently
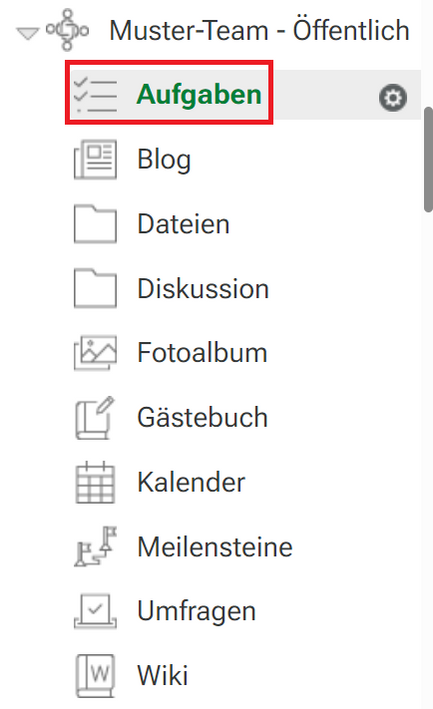
The team leader decides whether there is a Tasks area in a team. To edit the "Tasks" area, open it via the navigation on the left.
Use the "Create new task" button to create a new task. Each team member can open new task entries.


Give the task a meaningful title.
Describe the task in the text field. Make the content appealing with images, links and subheadings.
Due date: The task should be completed by this date.
Priority: You can assign a priority to the task so that it is clear which task should be completed first.
Assigned to team member
Assigned to group
Assigned to teams
Email notification: You can use the "Send email notification to assignee" option to inform people, groups or teams about the task.
Status: This allows you to document which action is required next.
Completed: Here you can document how far the task has been completed.
Attachment: You can add attachments to your task.
Subscribe: If you subscribe to the entry, you will be informed of changes by e-mail.
Send e-mail after sending the entry
Calendar

Each team can use a team calendar, e.g. to
- plan and communicate joint appointments
- organize duty rosters
- plan room assignments
The team management decides whether there is a calendar in a team. To edit the calendar, open the calendar via the navigation on the left.
Use the "New calendar entry" button to create a new calendar entry. You define the following:
- Title
- Location
- Place Description
- Date and time
- Time of day
- Repetition of the date
- Participants
You can inform the participants about the appointment by e-mail.


- Enter a title.
- Enter a location if necessary.
- If necessary, enter a description, e.g. the agenda of a meeting.
- Enter the date and time in the mandatory field "Event".
- An appointment can be repeated regularly.
Select the participants individually if you want to specify them individually.
Under "Participant groups", select groups from the directory service for which the appointment is for.
You can also invite your entire team to the calendar entry.
You can use the "Send e-mail notification to participants" option to inform people, groups or teams about the calendar entry.
You can upload files as attachments.
If you subscribe to this entry, you will receive information about updates to this event.
Specify whether the participants should be informed by email.
Click on "OK" to finalize the editing and complete the calendar entry. A completed calendar entry can be edited again at any time.
In Teaming, you can synchronize any calendars and display them in a central, combined calendar in the accessories area (of your workspace or a team). With the help of this function, you do not need to look through several calendars.
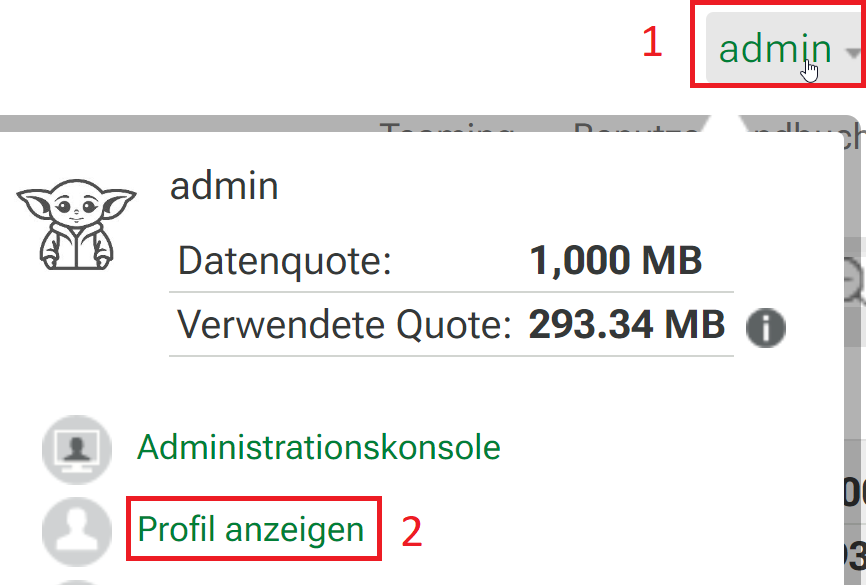
1) First select your name in the top right-hand corner
2) Then go to "Show profile"
Select the "Accessories area" in the personal workspace.
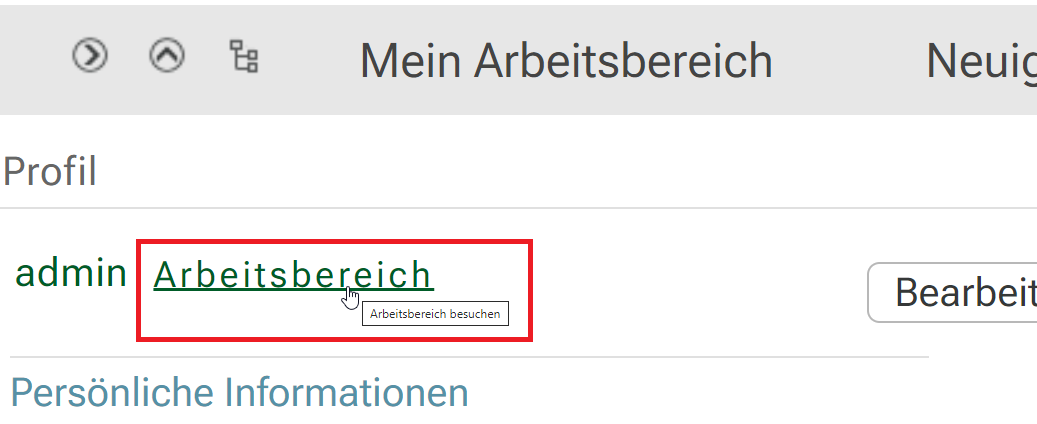
Then select your workspace.

Click on the Accessories tab.

Open the accessories area using the small green arrow.
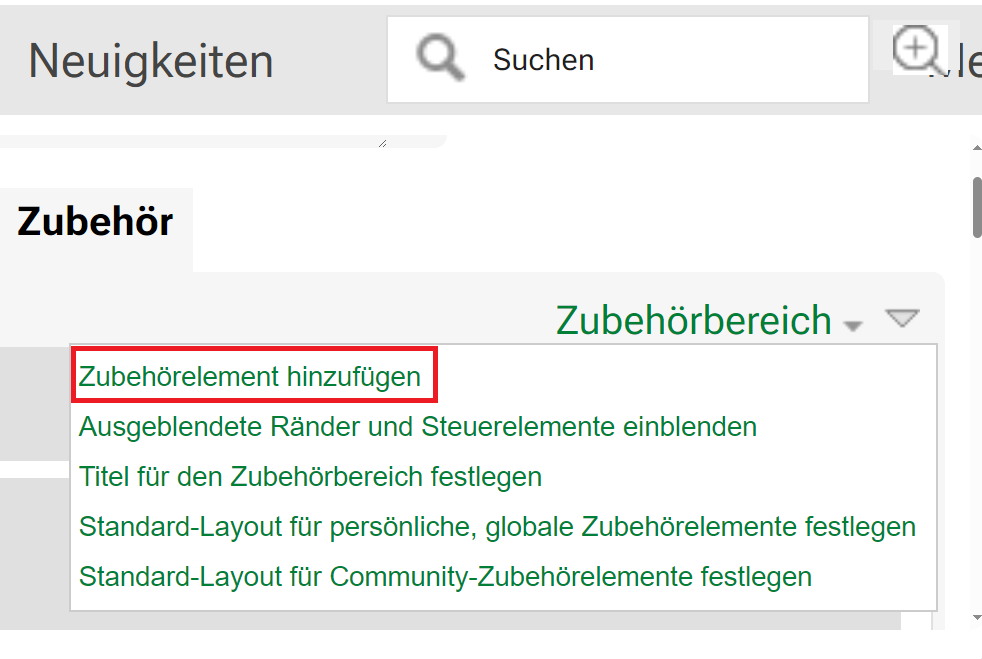
Click on "Add accessory element".
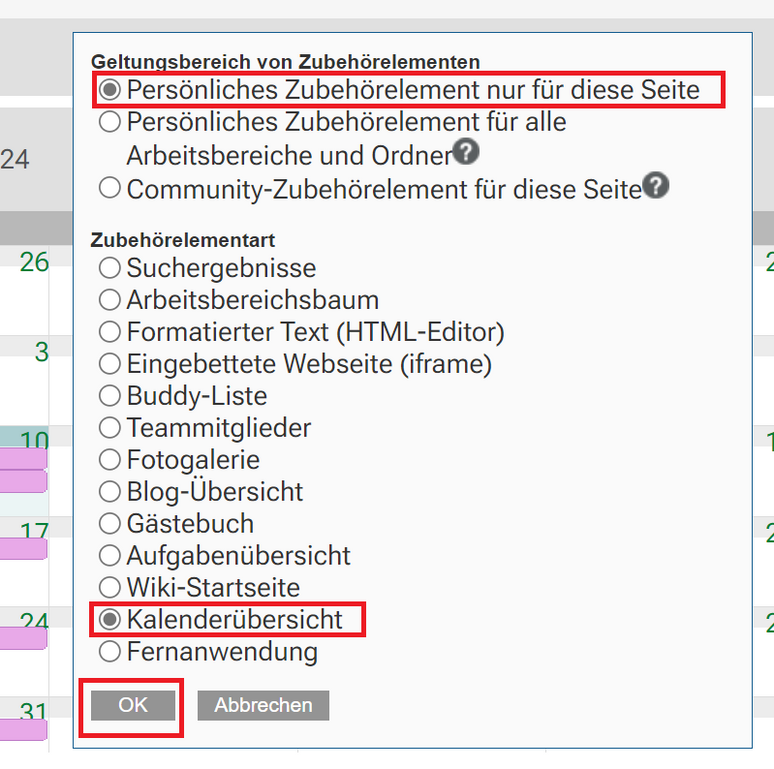
In the following section, first select the "Scope of accessory elements" where the accessory element should be displayed.
- Personal element for this page only: This accessory element is only displayed to you and only on the workspace or folder page you are currently on.
- Personal accessory element for all workspaces and folders: This accessory element is only displayed to you, but is visible on all workspace and folder pages that you call up.
- Community accessory element for this page: This accessory element is only displayed on this page, i.e. to everyone who calls up the page. Only owners of workspaces and folders are authorized to set up community accessory elements.
In the "Accessory type" section, select the "Calendar overview" option. Click on "Ok".
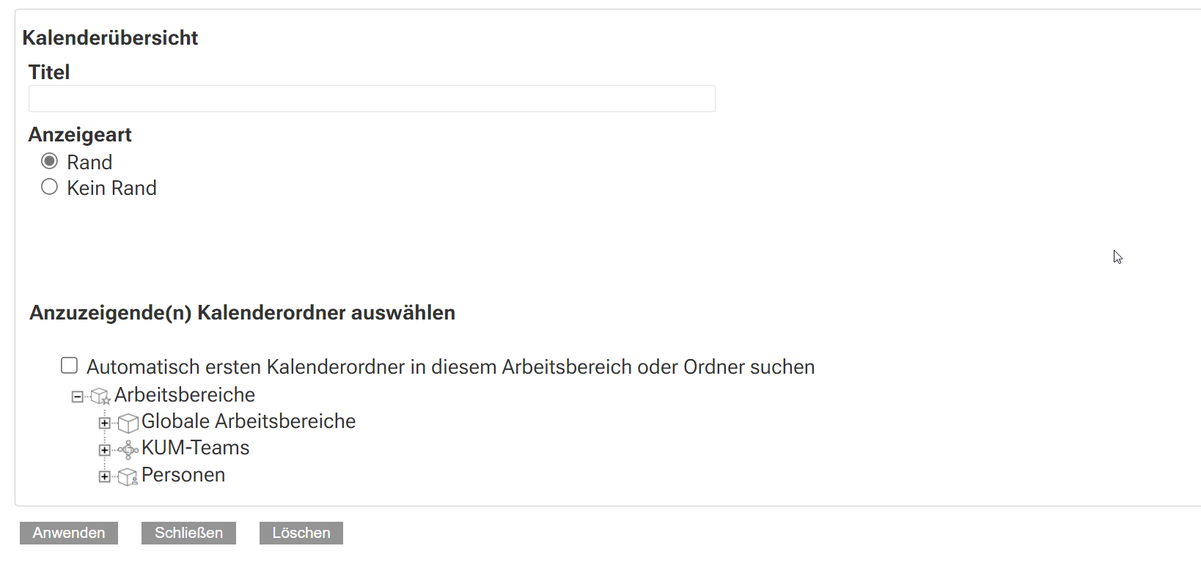
- On the "Setting up accessories" page, enter a title for the calendar in the "Title" field.
- In the "Display type" section, select whether a border should be displayed around the calendar.
- In the "Select calendar folder(s) to display" section, browse the workspace tree and select all calendars to be included in the "Calendar overview" accessory element. KUM Teams takes all calendar events from all calendar folders selected here and displays them in a single calendar in the accessories area. Finally, click on "Apply" and "Ok".
- Alternatively, you can also follow the calendars that you want to have displayed in the one calendar. To do this, go into each calendar and click on "Follow calendar" (can be found under the cogwheel)
wiki

Each team can use the Wiki area to, for example
- create a shared knowledge database,
- document instructions for work processes,
- maintain an internal reference work.
The wiki in Teaming offers you, among other things, the possibility to
- create several wiki areas on different topics,
- use an internal search.
The team leader decides whether there is a wiki in a team. To edit the wiki area, open it via the navigation on the left.
You can set up several wiki areas on different topics in your team.

Use the "New wiki topic" button to create a new wiki area/topic. Each wiki topic can have several subpages.

To switch back and forth between the different wiki topics, click on the name of the relevant wiki topic.

You can create as many new pages as you like for each topic. Use "New(-s/-r) wiki page" to create a new page. Set one of these topic pages as the start page (description below).
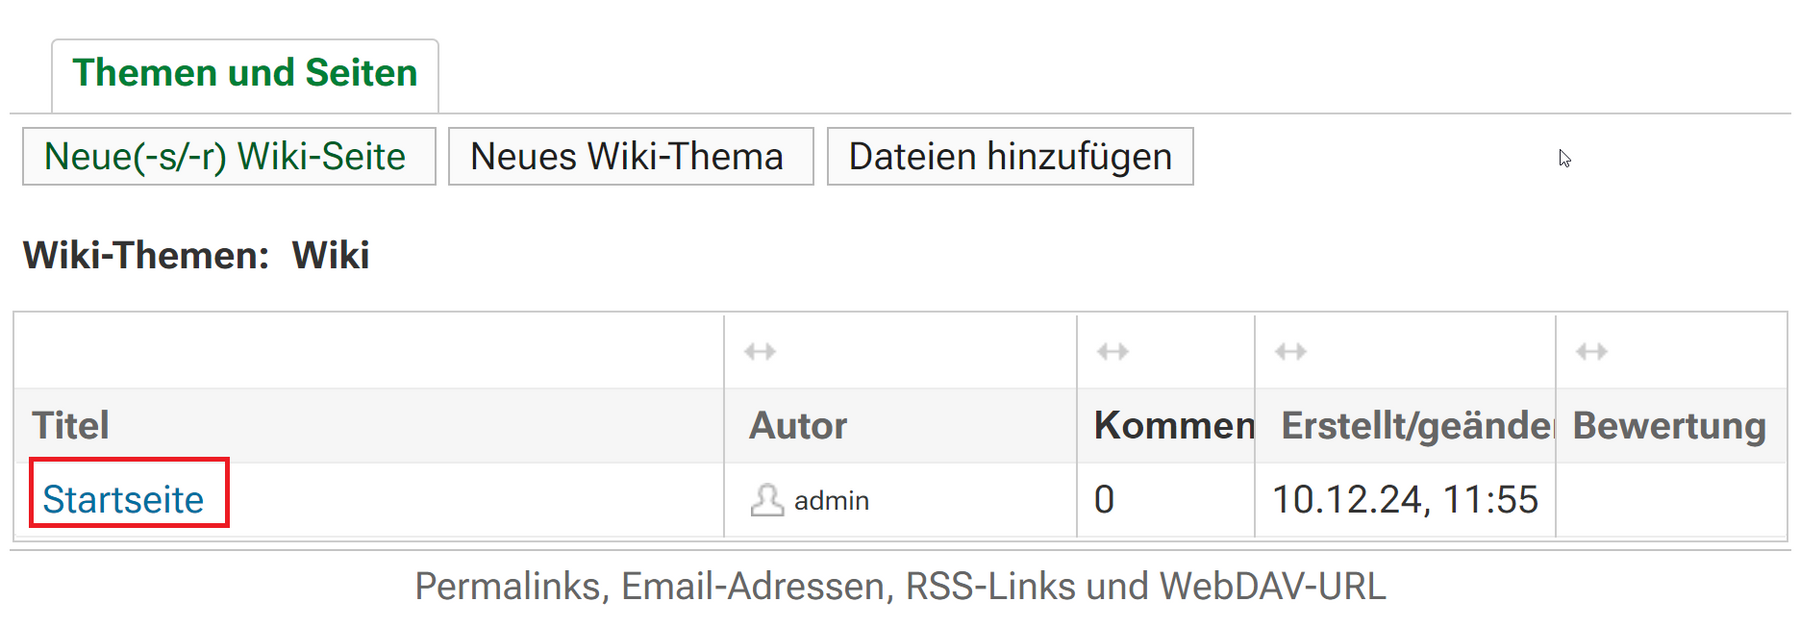
Click on the title of the page you want to make the start page of your wiki topic.
Set a different page as the start page for each topic.

Use Actions > Set wiki start page to make the selected wiki page the start page of your wiki topic.

You can create as many new pages as you like for each topic. Use "New(-s/-r) wiki page" to create a new page. Set one of these topic pages as the start page (description below).
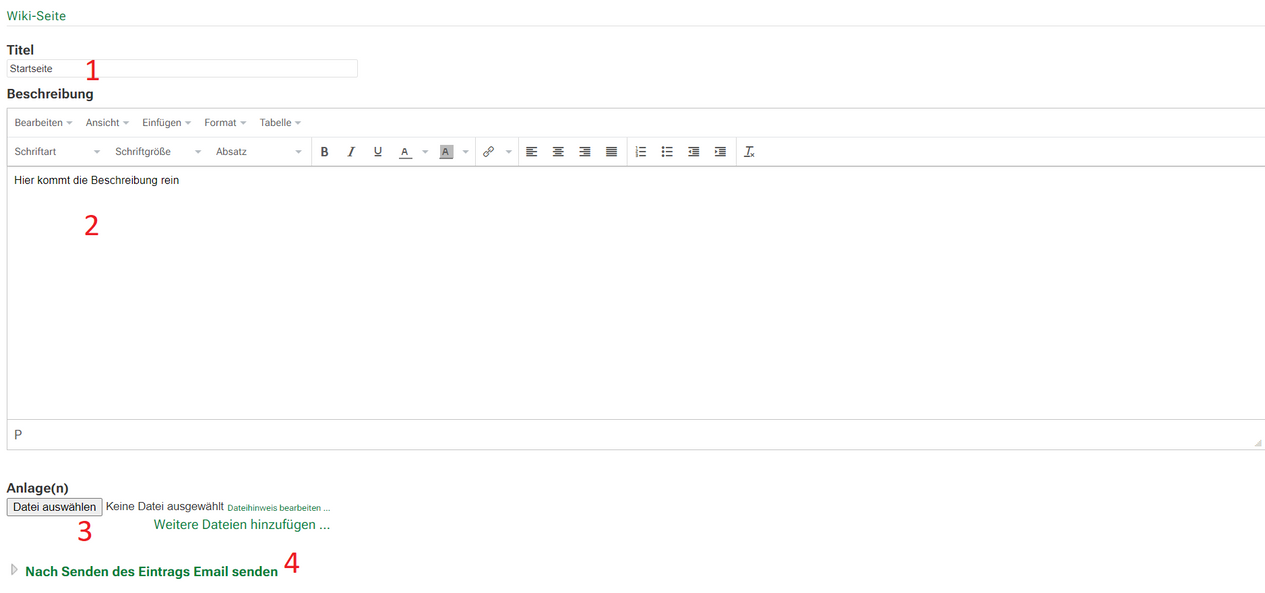
- Give the wiki page a meaningful title.
- In the text field, design the content of your wiki page attractively with images, links and subheadings.
- You can add attachments to your wiki page.
- You can inform other people, groups or teams about the wiki entry using the "Send email after sending the entry" option.
Click on "OK" to publish your wiki page.
Use the "Topics and pages" button to open the overview of all topics in your wiki. Your wiki start page is marked with a house symbol.
Click on the "Page" button to go to your wiki homepage.
poll
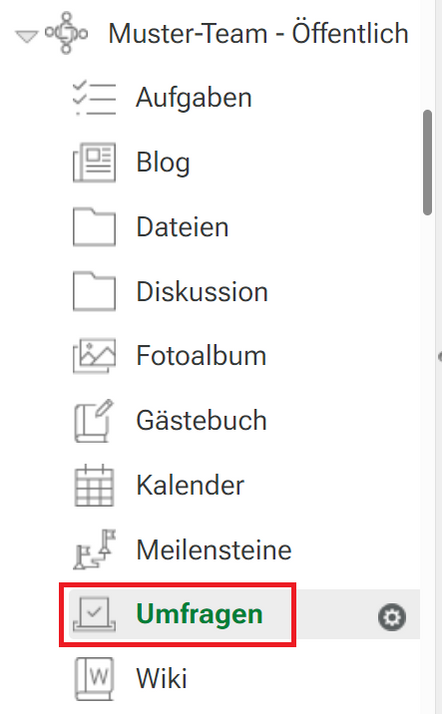
With polls, every team can
- quickly and easily vote on topics,
- query opinions,
- make uncomplicated group decisions.
You will find the polls in the left-hand navigation. The team management decides whether there are polls in a team.
Use the "New survey" button to create a new survey. You define the following:
- Title
- Location
- Location Description
- Due date
- Type and number of questions
- Who can see the poll results
- Whether votes may be changed
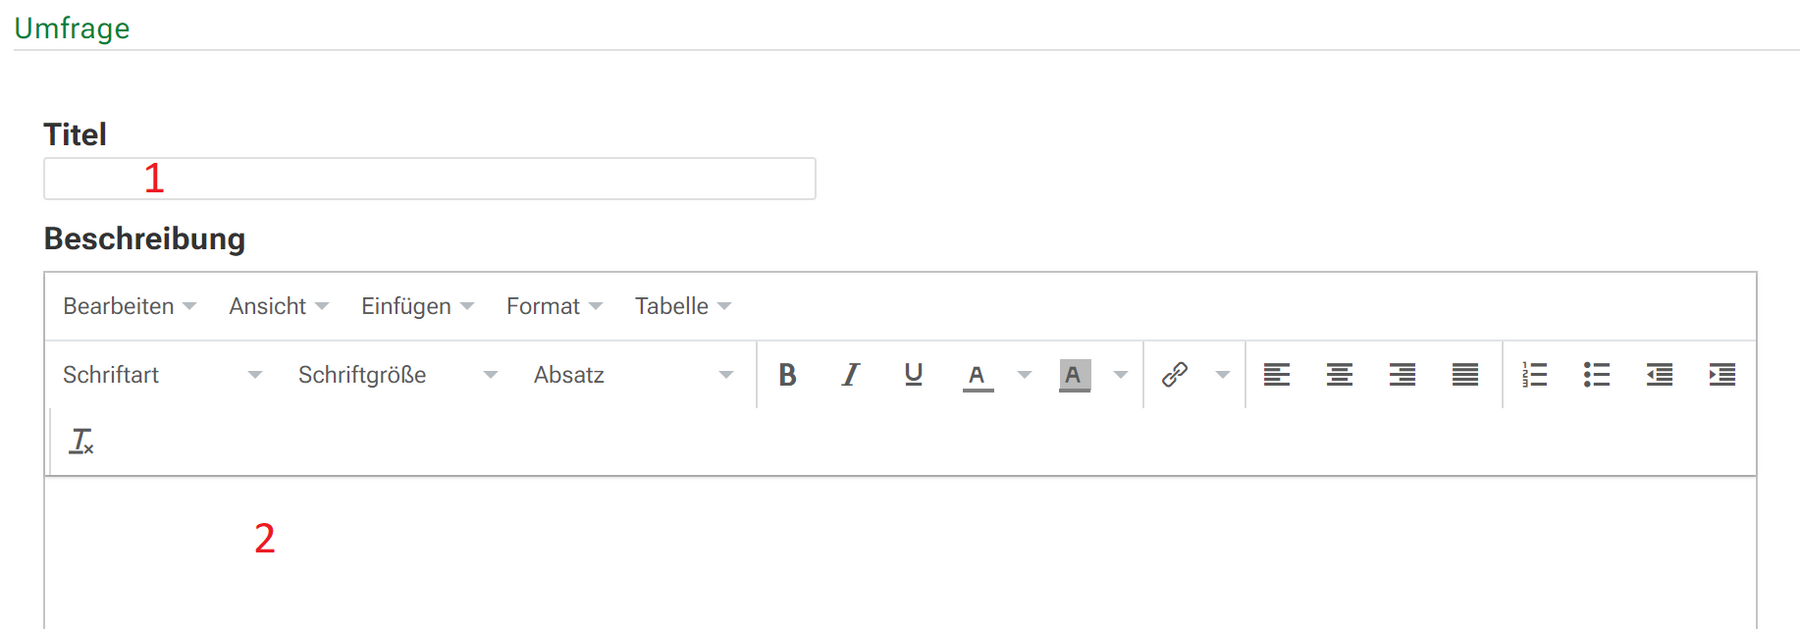


- Enter a title.
- Enter a short description of the survey.
- You can upload files as attachments.
- Enter a due date. A mini-calendar module makes it easier for you to select the date.
Specify who can see the voting results before the due date.
Specify who can see the voting results after the due date.
Create questions. Choose from three possible question types. Click on the question type to open the editing of the individual questions. You can ask several questions in your survey. The following question types are available:
- Multiple choice: Several answers
- Written answer (text input)
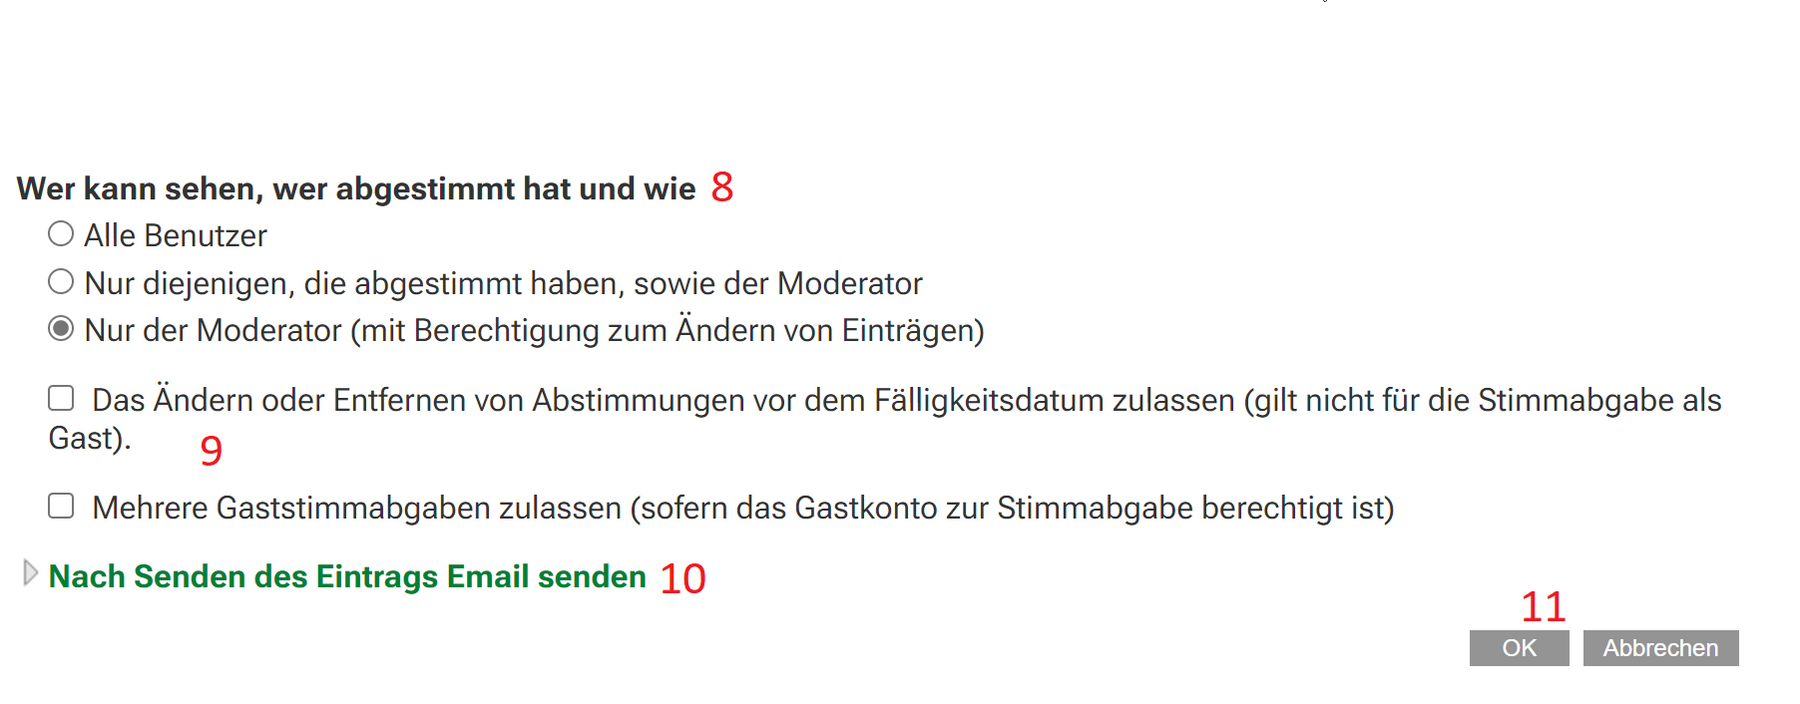
- Multiple choice: One answer- Decide who can see who has voted and how.
- Decide whether participants can change their entry before the due date and whether multiple guest votes can be cast.
- Choose whether and to whom you want to send e-mail notifications.
- Complete the poll by clicking on "OK".
Photo album
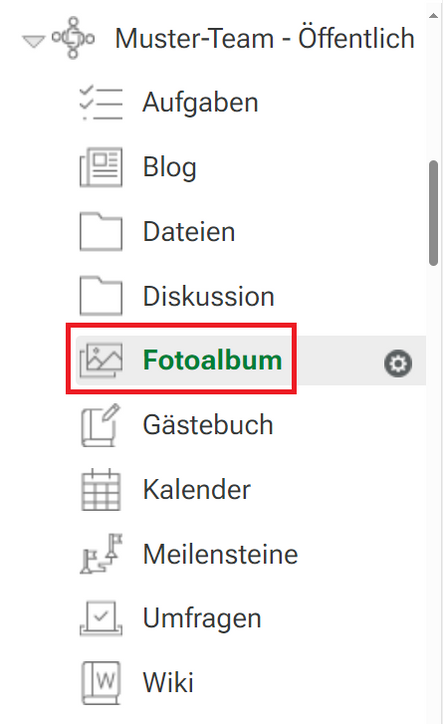
Each team can use the "Photo album" area to e.g.
- provide pictures
- exchange photos of events.
Whether a team has a photo album is decided by the team leader. To edit the photo album area, open it via the left-hand navigation.
This variant is suitable for all users who
- do not have a current Java version
- want to create additional information about the file when creating it.
You can upload an image file using the "New(-s/-r) photo entry" button. This works in the same way as uploading files via "New file entry".
When uploading, you can enter further information about the image.
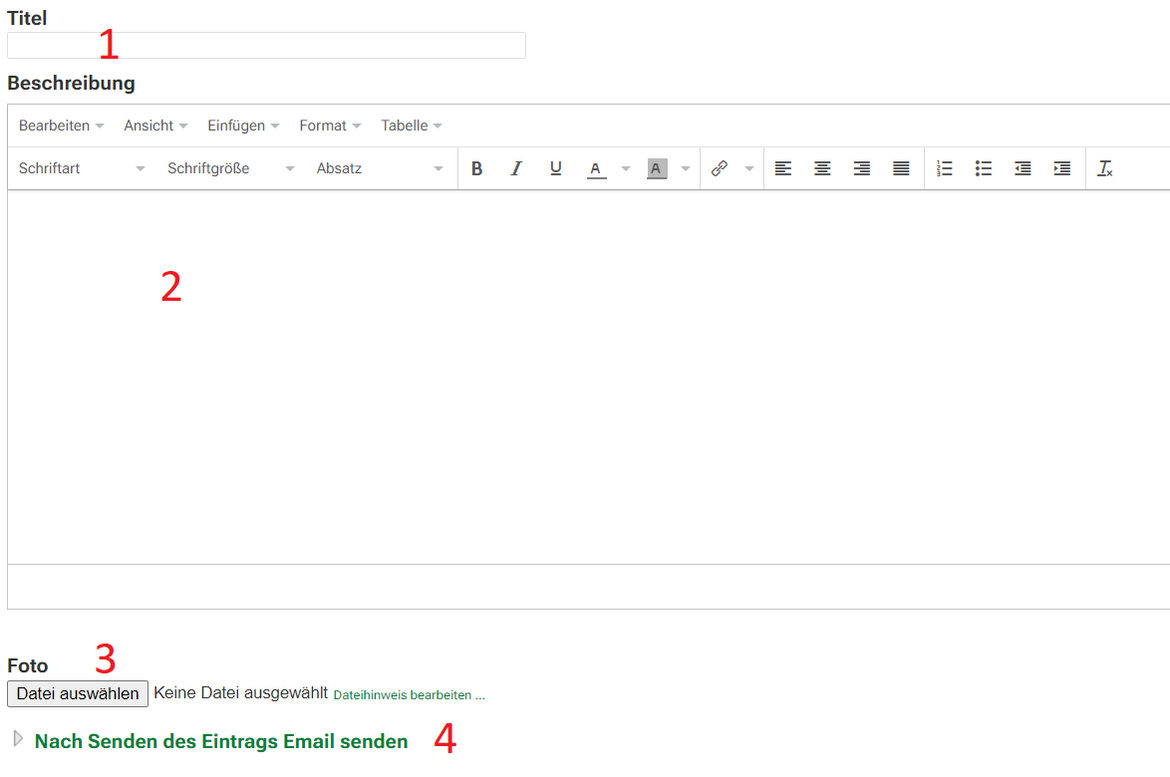
- Title (optional): Give the image a meaningful title. If you leave the field empty, the file title of the photo will be displayed.
- Description: (optional) You can enter additional information about your image in the editor.
- Photo: Select your photo here via "Browse".
- Send email after sending the entry: Send an e-mail to specific users or to your entire team.
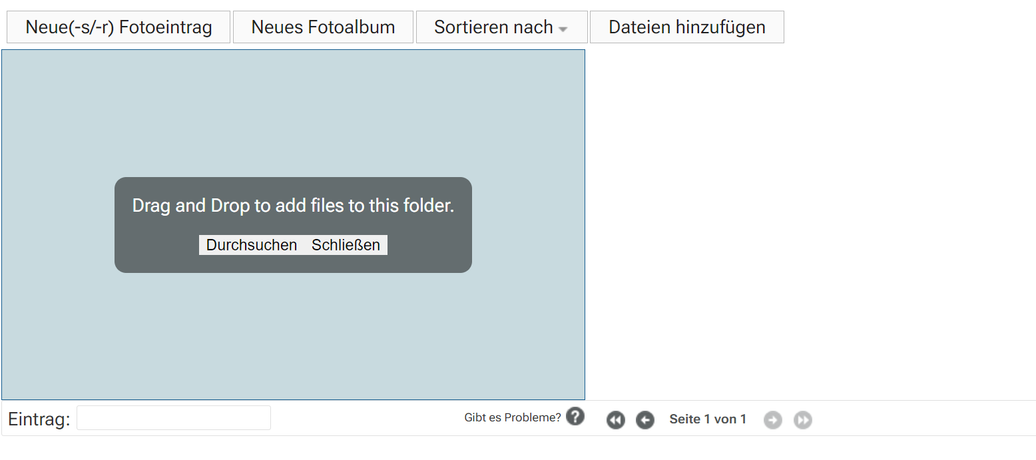
This option allows you to upload your image or folder with images quickly and easily via drag & drop. This variant works in the same way as uploading files via "Add files".
It is important that you drag your file or folder exactly into the area with the folder symbol. A Java applet will start and your file will be imported automatically. You can add comments to the file entry afterwards, for example.
Guestbook
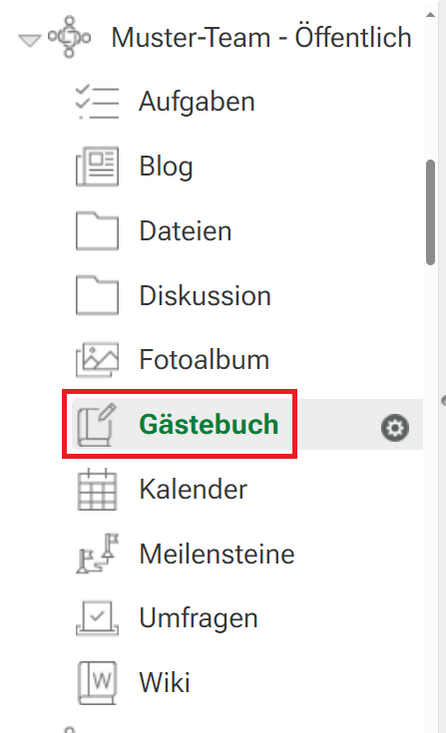
Each team can use the "Guestbook" area, e.g. to
- write comments quickly and easily
- and/or leave names.
The team management decides whether there is a guestbook in a team.
To edit the guestbook area, open it via the navigation on the left.
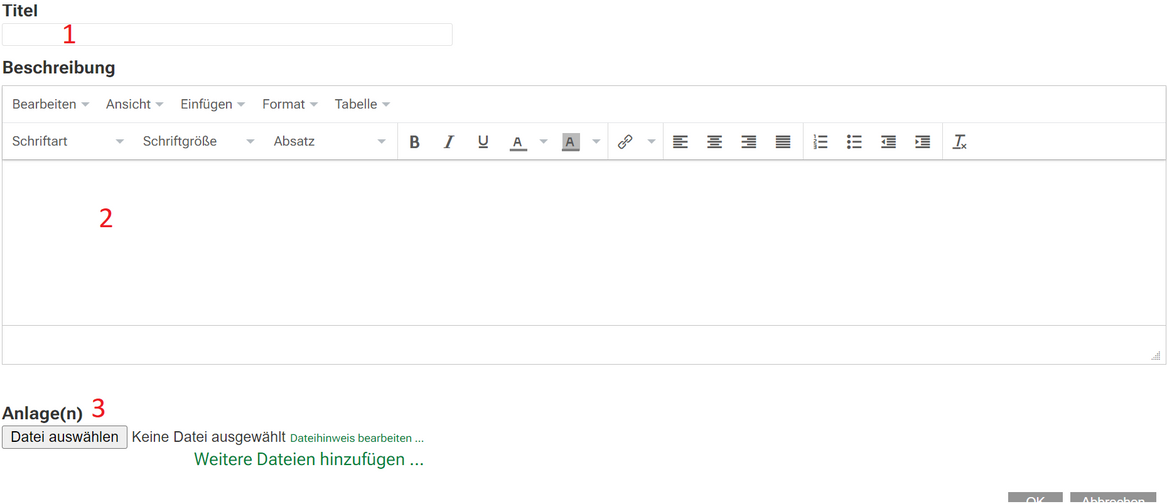
- Enter a title
- Write your guestbook entry
- You can upload files as attachments
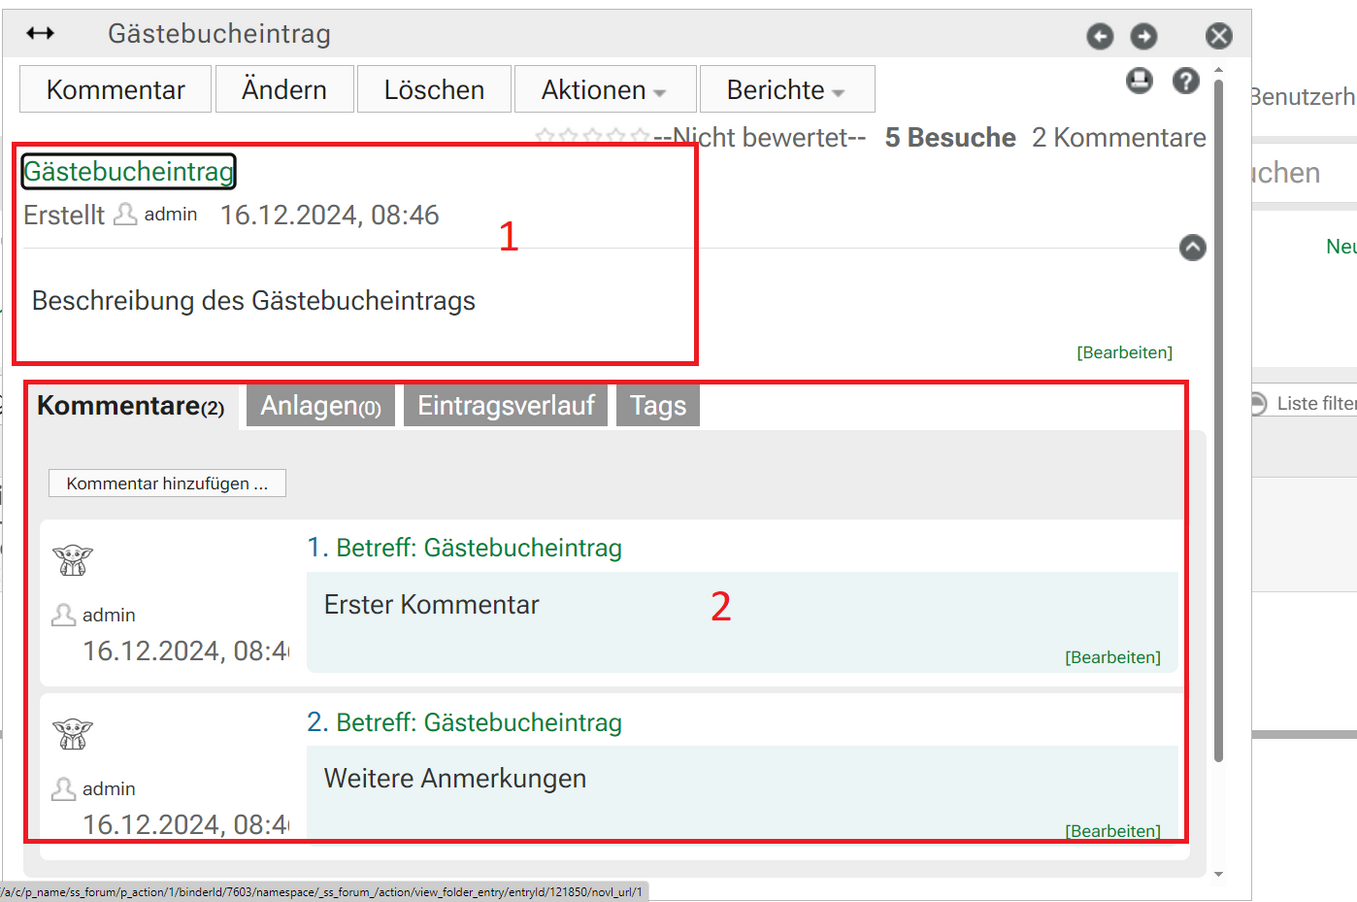
- Presentation of the new guestbook entry
- Comments on the guestbook entry are possible and are listed chronologically

